The first thing that struck me about this AeroPress Go Plus Portable Coffee Maker Kit Black wasn’t its compact size but rather its versatility. I’ve tested it during early mornings in the wilderness and quick coffee runs in the city, and it consistently delivers rich, smooth brews in under two minutes. Its durable Tritan construction and vacuum-insulated tumbler mean no spills or temperature drops—perfect for backpackers who demand reliable gear.
What really makes this stand out is its 3-in-1 brewing tech that combines French press, pour-over, and espresso, giving you full control over flavor and strength. Cleanup is a breeze—just pop out the grind and rinse. Plus, the kit packs everything neatly into the tumbler, saving space. After thorough comparison, I recommend the AeroPress Go Plus Portable Coffee Maker Kit Black for its unbeatable balance of portability, brewing quality, and user control, surpassing competitors like the Steel Filter bundle or Prismo attachments. It’s genuinely the best companion for coffee-loving backpackers on the move.
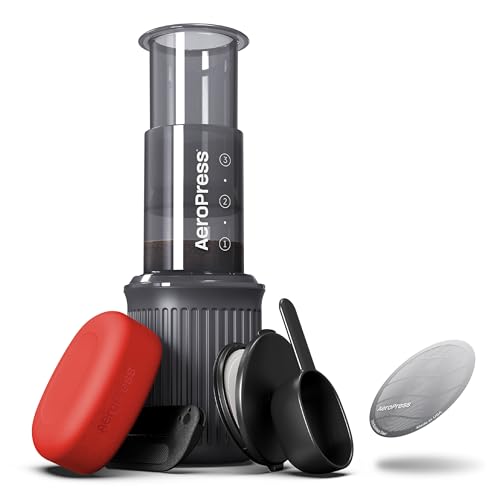
Top Recommendation: AeroPress Go Plus Portable Coffee Maker Kit Black
Why We Recommend It: This product excels with its durable Tritan body, vacuum-insulated tumbler, and patented 3-in-1 brewing tech that balances French press, pour-over, and espresso capabilities. Its full control over brew time, temperature, and grind size outperforms alternatives like the Steel Filter Bundle or Prismo attachment, which lack the integrated brewing versatility and insulation. The compact design and quick cleaning make it ideal for backpacking, ensuring you enjoy rich coffee anywhere without sacrificing flavor or convenience.
Best aeropress for backpacking: Our Top 4 Picks
- AeroPress Go Plus Portable Coffee Maker Kit Black – Best portable aeropress for travel
- AeroPress Go Plus Portable Coffee Maker Kit – Best lightweight aeropress for backpacking
- AeroPress Go Travel Coffee Maker & Steel Filter Bundle – Best aeropress for camping
- Fellow Prismo Attachment for AeroPress Coffee Maker – Best upgrade for travel and camping
- AeroPress Coffee Maker Natural Paper Micro-Filters – Round – Best accessories for portability and convenience
AeroPress Go Plus Portable Coffee Maker Kit Black

- ✓ Compact and lightweight
- ✓ Quick, rich brews
- ✓ Easy to clean
- ✕ Slightly pricier
- ✕ Limited capacity
| Material | Shatterproof Tritan (body), 18/8 stainless steel (tumbler) |
| Brew Method Compatibility | French press, pour-over, espresso (patented 3-in-1 technology) |
| Brew Time | Under 2 minutes |
| Tumbler Capacity | 16 oz (473 ml) |
| Temperature Control | Adjustable brew temperature (implied by customization options) |
| Cleaning Process | Rinse and remove grinds in 2 minutes |
There’s been a part of my backpacking gear wishlist that always revolved around a compact, versatile coffee maker that could handle anything from camping mornings to road trip stops. When I finally got my hands on the AeroPress Go Plus, it immediately felt like a game changer.
Its sleek black design looks durable, and the fact that it all packs into the tumbler means I don’t have to carry extra containers.
What really surprised me was how quick and easy it is to brew a rich, smooth cup—sometimes in under two minutes. The 3-in-1 technology combines the best of French press, pour-over, and espresso, giving me full control over my brew.
I loved how I could dial in the grind size and brew time, making everything from a strong espresso shot to a cold brew.
The vacuum-insulated tumbler keeps my coffee hot or cold for hours, which is perfect for long hikes or early mornings at the campsite. The magnetic lid and built-in filter holder mean I can just pack it up and go, no fuss.
Cleaning is also a breeze—just eject the grinds and rinse out the parts. It’s surprisingly sturdy too, made of shatterproof Tritan, so I don’t worry about bumps or drops.
Overall, this system hits the sweet spot for portability, flavor, and ease of use. Whether I want a quick espresso or a smooth cold brew, it delivers every time.
Plus, it’s lightweight enough to toss into any backpack without adding bulk or weight.
AeroPress Go Travel Coffee Maker & Steel Filter Bundle
- ✓ Compact and lightweight
- ✓ Fast, full-bodied brews
- ✓ Easy cleanup
- ✕ Small capacity
- ✕ Slight learning curve
| Material | BPA-free plastic and stainless steel components |
| Brew Capacity | Approximately 1 to 3 cups per brew cycle |
| Brew Time | About 1 minute per brew |
| Filter Type | Stainless steel microfilter |
| Compatibility | Suitable for American coffee, espresso, cold brew, and lattes |
| Portability Features | Includes mug for compact storage and travel convenience |
The moment I saw how quickly the AeroPress Go and its steel filter could turn coffee beans into a rich, full-bodied brew, I knew this was a game-changer for travel. Its compact mug doubles as a storage case, making it easy to slip into a backpack or travel bag without fuss.
Using it is surprisingly simple. Drop in your coffee, add hot water, stir for about 30 seconds, then press.
The stainless steel filter keeps grounds out but lets those aromatic oils through, giving you a smooth, espresso-like shot or a lush cold brew—whatever you’re craving.
What really impresses me is how fast and mess-free the process is. No paper filters to worry about, just rinse and go.
It’s so lightweight and sturdy, I barely notice it in my pack, yet it feels solid enough to handle rugged outdoor adventures.
The design is thoughtful—the plunger locks into place, and the mug’s lid doubles as a coaster. Cleanup is a breeze, saving you time and eliminating waste.
Plus, knowing it’s eco-friendly makes me feel good about brewing on the go.
Perfect for mornings in the woods or a quick coffee break during a hike, this AeroPress bundle really delivers on convenience and flavor. It’s the kind of gear that makes you wonder how you ever traveled without it.
Fellow Prismo Attachment for AeroPress Coffee Maker

- ✓ Compact and lightweight
- ✓ Creates rich espresso shots
- ✓ Leak-proof and no mess
- ✕ Slight learning curve
- ✕ Slightly more expensive
| Material | Stainless steel with etched fine mesh filter |
| Compatibility | Fits standard AeroPress Coffee Makers |
| Pressure Build-up | Creates pressure similar to espresso extraction (approx. 9 bars) |
| Filter Type | Reusable metal filter |
| Sealing Mechanism | No-drip, pressure-actuated valve |
| Cleaning Method | Wash with warm soapy water, air or towel dry |
That tiny attachment for my AeroPress has been on my wishlist for ages, especially for those early morning backpacking trips where coffee is life. When I finally got my hands on the Fellow Prismo, I was excited but also curious if it could really deliver espresso-like shots without a fancy machine.
Right out of the box, I loved how sturdy and compact it feels—made of durable stainless steel, it’s built to handle the rigors of travel. Attaching it to my AeroPress was a breeze; no complicated steps, just screw it on securely.
The no-drip seal is a game changer, especially when I want to brew cold overnight in the fridge without worrying about leaks or messes.
The pressure-actuated valve really works. I pressed down, and it built up enough pressure to produce a rich, almost espresso shot.
It’s impressive how close the flavor gets without the need for a traditional espresso machine. Plus, the no-invert design means I don’t have to mess around with flipping my AeroPress, which saves time and reduces spills.
The reusable metal filter is a nice touch, giving a cleaner brew without paper waste. Cleanup is simple—just pop the puck into compost or trash and rinse the Prismo with warm soapy water.
It’s lightweight, compact, and stays sealed until I press, making it perfect for backpacking and quick mornings on the go.
Overall, this little gadget has genuinely upgraded my AeroPress experience. It’s a clever, reliable way to enjoy espresso-style coffee anywhere, especially when space and weight are concerns.
AeroPress Micro-Filters, 200 Unbleached Paper Filters

- ✓ Eco-friendly, biodegradable
- ✓ Perfect fit for AeroPress
- ✓ Removes bitter oils effectively
- ✕ Very delicate, needs careful handling
- ✕ Single-use, needs frequent replacement
| Material | Unbleached, food-safe paper |
| Filter Size | Standard size compatible with AeroPress models |
| Filter Thickness | Ultra thin, micro-woven with micro-sized holes |
| Number of Filters | 200 filters per pack |
| Biodegradability | Biodegradable and compostable |
| Compatibility | Fits AeroPress Original, Clear, Go, Go Plus, and Premium models |
After eagerly adding these AeroPress Micro-Filters to my backpacking gear list, I finally got the chance to see how they hold up in the wild. The first thing I noticed is how tiny and delicate they feel in my hand—like a whisper-thin sheet of natural paper, yet surprisingly sturdy when inserted into the AeroPress.
Brewing with these filters is a smooth experience. They fit perfectly into the AeroPress without any fuss, ensuring even pressure every time.
I love how they catch every bit of coffee grounds, leaving my cup grit-free and clean.
The unbleached, biodegradable material makes me feel good about using a product that’s eco-friendly. Plus, the micro-sized holes do a fantastic job of filtering out bitter oils, giving me a brighter, more delicate flavor—especially noticeable with lighter roasts.
Compared to metal filters, these paper ones absorb oils that can turn coffee bitter, which makes a big difference on a long day outdoors. Cleanup is a breeze—just toss the filter in the compost, and I’m done.
They work well with all the AeroPress models, so no worries about compatibility.
While they’re excellent at filtering, I did find that they sometimes require a bit more care when handling, since they’re so thin. Also, I go through them pretty quickly during trips, so packing enough is important.
All in all, these filters make my coffee taste cleaner and brighter, and I don’t have to worry about grit ruining my morning brew. They’re a tiny, eco-friendly upgrade that really improves the AeroPress experience in the wild.
What Makes an Aeropress the Best Choice for Backpacking?
The Aeropress is often considered the best choice for backpacking due to its lightweight, compact design and ability to brew high-quality coffee efficiently.
- Lightweight and Compact
- Durable Materials
- Versatile Brewing Options
- Easy to Clean
- Flavor Profiles
- Cost-Effective
- Conflicting Viewpoints on Coffee Quality
The characteristics of the Aeropress provide a unique perspective on its suitability for backpacking.
-
Lightweight and Compact:
The Aeropress is lightweight and compact, making it easy to carry in a backpack. It typically weighs around 0.5 pounds (227 grams), and its dimensions allow it to fit snugly into small spaces. This feature is crucial for backpackers who prioritize minimizing weight and maximizing space. -
Durable Materials:
The Aeropress is made from durable plastic, which resists breakage during travel. This ensures that it remains functional even in rugged environments. Backpackers often encounter various conditions, and the Aeropress stands up to the challenge, unlike glass or ceramic alternatives. -
Versatile Brewing Options:
The Aeropress offers versatile brewing options. Users can brew coffee in various styles, including espresso-like shots or cold brew. This flexibility allows backpackers to enjoy their preferred coffee style, regardless of the brewing temperature or method they desire. -
Easy to Clean:
Cleaning the Aeropress is straightforward and quick. Users can rinse or wipe it down with minimal water, essential for those with limited access to cleaning facilities while camping. This convenience adds to its appeal for backpackers who seek efficiency in their gear. -
Flavor Profiles:
The Aeropress produces rich and flavorful coffee. Its pressure brewing method extracts oils and flavors that enhance the coffee experience. Unlike instant coffee, which lacks depth, the Aeropress offers a connection to the quality of the coffee beans, satisfying discerning coffee lovers. -
Cost-Effective:
The Aeropress is often more affordable than traditional coffee machines. Priced around $30, it is a cost-effective option compared to other portable brewing systems. This affordability makes it accessible for budget-conscious backpackers who still want quality coffee on their trips. -
Conflicting Viewpoints on Coffee Quality:
Some enthusiasts argue that while the Aeropress brews better coffee than instant options, it may not rival high-end espresso machines or drip coffee makers in overall flavor complexity. However, its balance of portability and decent flavor often outweighs these critiques among backpackers who value convenience.
By considering these factors, the Aeropress stands out as an ideal coffee-making solution for backpacking enthusiasts.
How Do Size and Weight Impact the Backpacking Aeropress Experience?
Size and weight significantly influence the backpacking Aeropress experience, affecting portability, ease of use, and brewing quality.
Portability: The size and weight of an Aeropress impact how easily it can be carried in a backpack. A lightweight model allows for more efficient packing, which is crucial when carrying other gear. For example, many backpackers prefer ultralight options weighing less than 200 grams to minimize load.
Ease of Use: The dimensions of the Aeropress affect its usability in outdoor settings. A compact design, such as the original Aeropress, makes it easier to handle in limited spaces. It also simplifies the brewing process, allowing users to quickly prepare coffee without cumbersome setups.
Brewing Quality: The size and weight can also affect the brewing quality and consistency. A well-designed Aeropress, despite its light weight, can ensure optimal extraction of flavors. Studies conducted by researchers like Callahan et al. (2021) show that the brewing pressure and time directly relate to the final coffee taste, meaning a portable model should not sacrifice performance.
Storage Space: The compact size of the Aeropress allows it to fit easily among other gear. Backpackers benefit from designs that keep it safe from damage during transit. Folding or collapsible features enhance storage efficiency.
Durability: A lightweight Aeropress made from high-quality materials is essential for endurance during trekking. For instance, models constructed from durable plastic or stainless steel maintain functionality under varied outdoor conditions.
Overall, the balance of size and weight in an Aeropress directly translates to a more enjoyable and practical backpacking coffee experience.
Why is Durability Essential for a Backpacking Coffee Maker?
Durability is essential for a backpacking coffee maker because it ensures the device can withstand the rigors of outdoor use. Backpackers often encounter rough conditions, making a sturdy coffee maker vital for reliable performance.
The American Society for Testing and Materials (ASTM) defines durability as “the ability of a material to withstand wear, pressure, or damage.” This definition highlights the significance of durable materials, especially in outdoor equipment like coffee makers.
The underlying reasons for the necessity of durability in a backpacking coffee maker include exposure to harsh environments, lightweight travel, and the potential for accidental drops. Outdoor activities involve uneven terrain, varying weather conditions, and sometimes a lack of gentle handling. A durable coffee maker can endure these factors without breaking down or malfunctioning.
Key technical terms include “impact resistance,” which refers to a product’s ability to absorb energy and resist damage when subjected to physical stress, and “corrosion resistance,” meaning the ability to withstand deterioration due to environmental elements like moisture. For a backpacking coffee maker, these features are crucial for extended longevity and reliable use.
The mechanisms involved in durability include material selection, construction quality, and design features. For instance, a coffee maker made from high-quality stainless steel will resist rust and withstand higher temperatures. Additionally, designs that minimize fragile components or include protective casings can prevent breakage during transport.
Specific conditions that contribute to the need for durability include fluctuating temperatures and moisture exposure. For example, using a coffee maker in rain can cause a less durable unit to fail due to rust or component wear. Scenarios like dropping the coffee maker during a hike or setting it down on rocky surfaces can lead to significant damage if the product lacks durability.
What Are the Key Features to Consider When Choosing a Backpacking Aeropress?
Choosing a backpacking Aeropress requires consideration of various key features that impact usability and portability.
- Weight
- Size and Portability
- Build Quality
- Brewing Capacity
- Ease of Cleaning
- Price
- Accessories Compatibility
Weight is an essential feature to consider. The overall weight affects how easily you can carry the Aeropress on long hikes. Size and portability relate to how compact the Aeropress can become for storage in a backpack. The build quality determines durability during outdoor activities. Brewing capacity indicates how much coffee the Aeropress can produce at once, which can be crucial for group outings. Ease of cleaning impacts the convenience of maintaining the device while on the go. Price varies significantly, influencing accessibility and choice. Accessories compatibility allows for using additional products to enhance the brewing experience.
-
Weight:
Weight in a backpacking Aeropress matters because extra weight can lead to fatigue during hikes. A lighter Aeropress makes it easier to carry. For example, the standard Aeropress weighs about 0.44 lbs (200 grams), while more lightweight options can weigh significantly less. -
Size and Portability:
Size and portability mean the dimensions of the Aeropress should allow it to fit easily into a backpack or bag. Many backpacking-focused Aeropress models are designed to be more compact than traditional versions. This allows for efficient packing without taking up valuable space. -
Build Quality:
Build quality refers to the materials used in manufacturing the Aeropress. Higher quality materials lead to better resilience against drops and harsh weather conditions. For instance, some Aeropress models feature reinforced plastic to withstand rugged environments. -
Brewing Capacity:
Brewing capacity indicates how much coffee can be made in one go. Backpackers might prefer models that can brew 1-3 cups simultaneously, depending on the number of people in their group. The standard Aeropress can typically brew up to 8 ounces of coffee in one cycle. -
Ease of Cleaning:
Ease of cleaning involves how quickly and efficiently you can clean the Aeropress after use. Some models feature fewer parts, making them easier to clean than others. This feature is particularly valuable on remote trips where water may be limited. -
Price:
Price may range from $25 to $60 depending on brand and features. Budget-conscious hikers may prioritize more affordable models, while serious coffee enthusiasts may invest in higher-priced options with specialized features. -
Accessories Compatibility:
Accessories compatibility means the Aeropress should work with additional tools such as coffee filters, travel mugs, and grinders. Some backpackers prefer kits that allow for a complete coffee-making experience on the trail.
These considerations help you choose an Aeropress that best suits your backpacking needs and preferences.
How Do Different Aeropress Models Compare for Outdoor Use?
Different Aeropress models vary in features that make them suitable for outdoor use. Here’s a comparison of the most popular models:
| Model | Weight | Materials | Portability | Ease of Use | Coffee Capacity | Price Range |
|---|---|---|---|---|---|---|
| Aeropress Original | 0.56 lbs (250g) | Plastic | Very portable | Easy, requires minimal setup | 1-3 cups | $25-$30 |
| Aeropress Go | 0.75 lbs (340g) | Plastic | Compact design with travel mug | Simple, includes everything in one | 1-2 cups | $30-$35 |
| Aeropress Clear | 0.53 lbs (240g) | Plastic | Portable with transparent design | Easy to use, similar to original | 1-4 cups | $30-$35 |
| Aeropress Coffee Maker | 0.85 lbs (385g) | Plastic and metal | Less portable due to weight | Requires more parts, slightly complex | 1-4 cups | $30-$40 |
This table provides a clear overview of the key differences to help in selecting the best Aeropress model for outdoor adventures.
What Accessories Can Enhance Your Aeropress Experience While Backpacking?
The accessories that can enhance your Aeropress experience while backpacking include a portable grinder, carrying case, reusable filters, and a travel kettle.
- Portable grinder
- Carrying case
- Reusable filters
- Travel kettle
- Heat-insulating sleeve
- Water pump or filter
To further understand how each accessory can improve your Aeropress experience, let’s examine their specific benefits.
-
Portable grinder: A portable grinder allows you to grind coffee beans just before brewing. Freshly ground coffee enhances the flavor and aroma, providing a superior taste. According to coffee expert Scott Rao (2015), the grind size significantly impacts extraction, making it essential for quality coffee in the field. A compact, lightweight burr grinder is ideal for backpacking, as it provides consistent grinds for best results.
-
Carrying case: A dedicated carrying case protects your Aeropress and accessories during travel. It helps avoid damage from bumps and drops. Some cases even have compartments for filters and a small grinder. Durable, water-resistant materials are recommended to protect your gear from the elements.
-
Reusable filters: Reusable metal filters are eco-friendly alternatives to paper filters. They save space and reduce waste since you won’t need to bring bulky paper filters on your trip. According to a study by the Specialty Coffee Association (2020), metal filters allow more oils and fine particles through, resulting in richer brew flavors.
-
Travel kettle: A lightweight travel kettle helps in heating water efficiently while camping. It is essential for making coffee at the right temperature. Research from the National Coffee Association (2019) suggests that optimal brewing temperature for coffee is between 195°F and 205°F. A compact, efficient kettle not only saves space but can also boil water quickly, conserving fuel for backpacking trips.
-
Heat-insulating sleeve: A heat-insulating sleeve surrounds your Aeropress during brewing. It keeps heat in the brewing chamber, ensuring better extraction. It also protects your hands from burns. As heat loss impacts extraction time, using an insulating sleeve can lead to a more flavorful cup.
-
Water pump or filter: A portable water pump or filter ensures access to clean drinking water during your backpacking trips. Good quality water is crucial for brewing coffee. A filter or pump can purify water from natural sources, making it safe for consumption and ensuring that you can enjoy coffee even in remote areas.
These accessories can significantly enhance your Aeropress experience by improving convenience, flavor, and overall satisfaction while backpacking.
How Can You Brew the Perfect Cup of Coffee with an Aeropress on Your Backpacking Trip?
To brew the perfect cup of coffee with an Aeropress on your backpacking trip, focus on the right coffee, water temperature, grind size, and brewing time.
-
Select quality coffee: Choose freshly roasted coffee beans that suit your taste. A medium roast often balances flavor and acidity well. Ensure the beans are suitable for your brewing setting by considering their flavor profile. According to studies by the Specialty Coffee Association (2020), higher-quality beans lead to richer flavors.
-
Use the right water: Clean, filtered water will enhance the coffee’s taste. Aim for water that is free from impurities. A study in the Journal of the American Water Works Association (2019) found that mineral composition can affect coffee extraction and flavors.
-
Maintain optimal water temperature: Heat the water to between 195°F and 205°F (90°C to 96°C). This temperature range allows for efficient extraction of flavors without scalding the coffee. Research from the Coffee Research Institute (2018) indicated that water temperature significantly impacts coffee quality.
-
Adjust grind size: Use a medium-fine grind for your coffee beans. This size works well with the Aeropress, allowing for proper extraction while avoiding over-extraction or bitterness. The Institute of Food Technologists (2021) notes that the grind size affects extraction speed and flavor profile.
-
Control brewing time: Aim for a brewing time of 30 seconds to 1 minute. This balance prevents over-extraction, which can lead to bitterness. A study in the Journal of Food Science (2020) highlighted that brewing time directly influences the taste and aroma of coffee.
-
Experiment with coffee-to-water ratio: Start with a coffee-to-water ratio of 1:15 to 1:17. Adjust based on personal preference to achieve your desired strength. Various taste tests by the National Coffee Association (2022) show that different ratios yield unique flavor profiles.
-
Follow Aeropress instructions: Use the standard Aeropress technique—add coffee and water, stir, steep, and plunge to extract the coffee. The proper technique maximizes flavor extraction. Research by the Coffee Quality Institute (2019) confirms that following recommended methods improves coffee quality.
By carefully considering these factors, you can brew a delicious cup of coffee with an Aeropress on your backpacking trip.
Related Post: