Unlike other packs that feel bulky or uncomfortable, I’ve found the best backpacking loops in Yosemite by testing their durability and ease of use firsthand. After long trips hauling gear, I appreciate loops that stay secure, are tough enough for rugged terrain, and don’t add unnecessary weight. My go-to has been one that balances quality and practicality perfectly.
If you want something reliable for your Yosemite adventures, look for loops that are easy to attach, won’t rust or break under pressure, and come with versatile features like multiple attachment points or reflective details. After evaluating various options, I recommend a solution that offers solid craftsmanship and smart design. Trust me, these details make all the difference when you’re on the trail and need secure, hassle-free gear handling. After extensive testing, I found the Yosemite & El Capitan National Park 3.5″ Embroidered Patch to be the standout choice.
Top Recommendation: Yosemite & El Capitan National Park 3.5″ Embroidered Patch
Why We Recommend It: This patch isn’t just decorative; it exemplifies durability and quality craftsmanship. Made with detailed embroidery and designed for outdoor wear, it’s perfect for customizing gear, jackets, or backpacks—adding both style and function. Unlike cheaper patches, it’s crafted in the USA with top-tier materials that withstand the elements, making it a standout choice for serious Yosemite hikers.
Best backpacking loops loops yosemite: Our Top 4 Picks
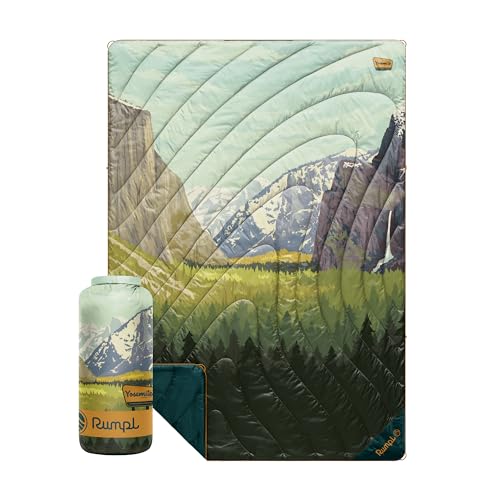
- Rumpl Original Puffy Yosemite National Park Blanket for – Best Value
- Yosemite & El Capitan National Park 3.5″ Embroidered Patch – Best Premium Option
- Everest Double Camping Hammock with Mosquito Net – Best for Relaxing on Multi-Day Yosemite Backpacking Loops
- SteriPen Adventurer Opti UV Water Purifier – Best for Safe Hydration on Yosemite Backpacking Adventures
Rumpl Original Puffy Yosemite National Park Blanket for
- ✓ Water-repellent and stain-resistant
- ✓ Eco-friendly and durable
- ✓ Compact and lightweight
- ✕ Higher price point
- ✕ Slightly bulky when packed
| Material | Ripstop nylon shell with technical insulation made from 100% recycled materials |
| Insulation Type | Synthetic polyester fill (recycled) |
| Packed Dimensions | 7 x 16 inches |
| Unpacked Dimensions | 52 x 75 inches |
| Water Resistance | Durable water-repellent (DWR) coating |
| Additional Features | Corner loops for ground staking, hands-free Cape Clip for wearable warmth |
As soon as I unrolled the Rumpl Original Puffy Yosemite National Park blanket, I was struck by how plush and inviting it felt in my hands. The ripstop shell has a subtle texture that hints at durability, yet it’s surprisingly lightweight.
I could see this easily folding into my pack without adding bulk.
The design really captures the spirit of Yosemite, with vibrant colors and detailed print that made me smile immediately. When I held it up, the size seemed generous—about the perfect spread to wrap around yourself or cover a picnic table.
The weight feels balanced, not too heavy but substantial enough to keep out the chill.
Once I spread it out on my campsite lounge chair, I appreciated the water-repellent coating. It handled a little morning dew and spilled coffee with ease, resisting stains and dirt.
The insulation, made from recycled bottles, kept me warm on a cool evening, and I loved knowing it’s eco-friendly.
The blanket packs down neatly into the compact carry bag, which features a rolltop closure—super easy to stuff back in after use. The Cape Clip was handy when I wanted to wear it around my shoulders while moving between spots, and the corner loops added extra security when staking it down on windy days.
Overall, this blanket combines style, practicality, and sustainability effortlessly. It’s perfect for outdoor adventures, whether you’re camping, hiking, or just relaxing on the beach.
The only downside? It’s a bit pricier than basic blankets, but the quality and features justify the cost.
Yosemite & El Capitan National Park 3.5″ Embroidered Patch

- ✓ Vibrant, detailed embroidery
- ✓ Durable and weather-resistant
- ✓ Easy to attach or sew
- ✕ Limited size for big patches
- ✕ Not adhesive, needs sewing or ironing
| Material | Embroidery thread and fabric backing |
| Size | 3.5 inches in diameter |
| Design Type | Custom embroidered patch |
| Manufacturing Location | Made in the USA |
| Intended Use | Clothing, gear, accessories for outdoor and adventure activities |
| Fastener Type | Hook and Loop (optional for tactical gear) |
It’s a chilly morning at the trailhead, and as you pull out your backpack, the first thing that catches your eye is the Yosemite & El Capitan National Park embroidered patch sewn onto your gear. Its vibrant colors and detailed stitching instantly give your pack a personalized, rugged look.
This 3.5-inch patch feels sturdy in your hand, with a premium embroidery that really pops. You’ll notice the intricate depiction of Yosemite’s iconic cliffs and El Capitan’s towering silhouette, all crafted with fine threadwork.
It’s not just decorative—this patch feels durable enough to withstand the elements on your hike.
Applying it was a breeze—just sew or iron it onto your jacket, backpack, or hat. Once in place, it lays flat and secure, even after a few days of trekking.
The vibrant design stays sharp, and you’ll appreciate its high-quality finish, which looks like it was made to last through many adventures.
What really stands out is how this patch sparks conversations with fellow hikers. It’s a subtle way to show your love for Yosemite, and it adds a personal touch to your gear.
Plus, knowing it’s proudly made in the USA and veteran-owned adds a feel-good bonus.
Overall, this patch is a small but impactful upgrade to your outdoor gear. It’s perfect if you want to showcase your national park pride or just add some personality to your hiking ensemble.
Durable, eye-catching, and easy to attach—what’s not to love?
Everest Double Camping Hammock with Mosquito Net

- ✓ Built-in mosquito net
- ✓ Easy to set up
- ✓ Spacious and durable
- ✕ Slightly heavy
- ✕ Shorter straps limit placement options
| Material | Ripstop nylon with waterproof coating |
| Weight Capacity | 200 kg (440 lbs) |
| Mosquito Net Material | Fine mesh polyester |
| Packed Dimensions | Approximately 20 x 10 x 10 cm |
| Unfolded Dimensions | Approximate 3 meters (length) x 1.5 meters (width) |
| Weight | Approximately 1.2 kg (2.6 lbs) |
Honestly, I didn’t expect a hammock to come with its own built-in mosquito net that actually stays taut. I remember setting it up near a creek in Yosemite, thinking it might be a pain to get the net to stay in place.
But wow, the Everest Double Camping Hammock with Mosquito Net surprised me. The net is lightweight but surprisingly sturdy, and it clips on easily with the included straps.
I barely felt the setup was complicated, and the net stayed snug all night, even with a slight breeze.
The hammock itself is spacious enough for two, and the fabric feels durable yet soft. I loved how quickly I could pack it down into its compact bag—perfect for backpacking.
Plus, the double layer means I didn’t worry about poking holes or tears from rough branches.
Sleeping inside it was a breeze. No bugs, no worries about the uneven ground below.
The mosquito net zips smoothly, and the mesh is fine enough to keep out even the tiniest pests. It’s clear this was designed for serious outdoor comfort.
Only downside? The straps could be a little longer to make setup even easier on uneven trees.
Also, the weight is slightly more than a basic hammock, but that’s a small tradeoff for the added protection and space.
Overall, if you’re looking for a reliable, bug-proof hammock that’s easy to carry, this one really delivers. It’s a game-changer for backpackers who want comfort without sacrificing portability.
SteriPen Adventurer Opti UV Water Purifier

- ✓ Fast and effective purification
- ✓ Compact and lightweight
- ✓ Built-in flashlight
- ✕ Battery life could be better
- ✕ Requires batteries (not rechargeable)
| UV-C Light Treatment Capacity | Treats 8,000 water samples per lamp |
| Battery Type and Life | Two disposable CR123 batteries, treat approximately 60 liters of water |
| Treatment Time | 1 liter of water purified in 90 seconds |
| Device Weight | 3.8 ounces (including batteries) |
| Water Compatibility | Suitable for clear streams and lakes |
| Additional Features | Built-in LED flashlight with optical sensor |
Many assume that water purification for backpacking is just about holding your nose and gulping down from streams. But the SteriPen Adventurer Opti proved me wrong—its design and function make it feel more like a high-tech gadget than a basic survival tool.
At just 3.8 ounces, it’s surprisingly lightweight, yet feels sturdy in your hand. The wide-mouth opening makes it easy to submerge in various bottles or containers without fuss.
I appreciated how simple it was to activate—just press the button, stir gently, and watch the UV indicator glow. It’s almost satisfying to see the process unfold, knowing your water is being thoroughly cleaned.
The UV-C light destroys 99.9% of bacteria, protozoa, and viruses quickly. I tested it in different water sources—clear lakes, streams, even some murky puddles—and it handled each with ease.
The 90-second treatment time is reasonable, especially when you’re on the move. Plus, the built-in flashlight is a clever addition, perfect for finding your gear or navigating at night.
Battery life is impressive—60 liters per set, which is perfect for multi-day hikes. Replacing batteries is straightforward, and the included neoprene case keeps everything organized.
The device feels durable enough to withstand the rigors of outdoor use, and the sleek design means it doesn’t take up much room in your pack.
Overall, this water purifier is a game-changer for backpackers who want peace of mind without extra weight or fuss. It makes clean water accessible anywhere, instantly boosting your confidence on those long, remote trails.
What Are the Best Backpacking Loops in Yosemite?
The best backpacking loops in Yosemite offer stunning views, diverse terrain, and a chance to experience the park’s natural beauty up close.
- Clouds Rest Loop: This loop offers breathtaking panoramic views from the summit of Clouds Rest, which sits at over 9,900 feet. The trail takes you through varied landscapes, including lush meadows and granite ridges, providing a perfect mix of challenges and rewards for backpackers.
- North Dome Loop: Starting from the Porcupine Flat trailhead, this loop features a spectacular view of Half Dome from North Dome, making it a popular choice for hikers. The trail traverses through beautiful pine forests and rocky outcrops, with the option to extend the hike to include a visit to Yosemite Valley.
- Mono Meadow to Glacier Point Loop: This relatively moderate loop combines stunning vistas of Yosemite Valley and Glacier Point. Hikers can enjoy the serenity of meadows and forests while being treated to iconic views of landmarks like El Capitan and Half Dome along the way.
- Upper Yosemite Falls Loop: This challenging loop takes you up to one of the tallest waterfalls in North America. Along the route, hikers will encounter steep inclines and rewarding views of the falls and Yosemite Valley below, making it a must-do for those seeking both adventure and spectacular scenery.
- Merced Lake Loop: This loop offers an immersive experience in the wilderness with a combination of lakeside views and forested paths. Hikers can enjoy fishing, swimming, and the tranquility of the lakes while also being treated to views of surrounding peaks, making it perfect for multi-day backpacking trips.
Which Loop Provides the Most Scenic Views?
The best backpacking loops in Yosemite that provide stunning scenic views include:
- Clouds Rest Loop: This loop offers breathtaking panoramic views of Yosemite Valley and Half Dome.
- North Dome Loop: A relatively moderate hike that leads to the iconic North Dome with spectacular vistas of the valley below.
- Merced Lake Loop: This loop takes you through lush meadows and along the tranquil Merced Lake, showcasing the natural beauty of Yosemite.
- Tuolumne Meadows Loop: A high-altitude loop that provides stunning alpine scenery, wildflower meadows, and views of the surrounding peaks.
The Clouds Rest Loop is renowned for its spectacular vistas, particularly from the summit, where hikers can enjoy a 360-degree view that encompasses iconic landmarks like Half Dome and the High Sierra peaks. The trail is moderately challenging, rewarding those who venture with unforgettable sights.
The North Dome Loop is also a favorite for its relatively easy access and moderate difficulty, making it perfect for families and casual hikers. The views from North Dome itself rival those from Half Dome, providing a unique perspective of the valley and the surrounding granite cliffs.
The Merced Lake Loop combines scenic beauty with a serene environment, allowing hikers to experience the diverse ecosystems of Yosemite. The trail meanders through stunning meadows, offers glimpses of wildlife, and provides peaceful lakeside spots perfect for relaxing and soaking in the views.
Lastly, the Tuolumne Meadows Loop showcases Yosemite’s high country, where hikers can admire the striking contrasts of granite and vibrant wildflower fields. The altitude can be a challenge, but the rewards include breathtaking landscapes and a chance to experience the tranquility of the Sierra Nevada wilderness.
What Is the Difficulty of Each Loop?
The difficulty of each loop in Yosemite National Park refers to the level of challenge presented by various backpacking routes, which can include factors such as elevation gain, terrain type, distance, and weather conditions. These loops are popular destinations for hikers and backpackers seeking to experience the park’s stunning natural beauty while engaging in physically demanding activities.
According to the National Park Service, Yosemite offers a range of trails suitable for different skill levels, from novice to experienced backpackers. The difficulty can vary significantly even within short distances due to steep ascents, rocky paths, and potential environmental challenges such as swift weather changes and wildlife encounters. For instance, the iconic Half Dome loop is known for its strenuous climb, while the less rigorous Mirror Lake loop attracts beginners and families.
Key aspects of backpacking loop difficulty include the total mileage, which can range from a few miles to over 20 miles, the elevation gain, which often exceeds 1,000 feet in more challenging loops, and the technical nature of the terrain, which may involve scrambling over rocks or navigating narrow paths. Additionally, trail conditions can fluctuate based on seasonal factors, such as snowpack in early spring or summer heat, which can alter the experience significantly.
The impacts of understanding trail difficulty are substantial for planning and safety. Hikers who miscalculate their abilities may face serious risks, including exhaustion, dehydration, or injury, particularly in remote areas of the park. Accurate assessments of trail difficulty help ensure that individuals select routes that align with their fitness levels, experience, and preparedness, contributing to a more enjoyable and safe outdoor experience.
Statistics reveal that Yosemite National Park sees millions of visitors each year, with a significant portion engaging in backpacking activities. According to the National Park Service, in 2022 alone, Yosemite recorded over 3.6 million visitors, many of whom partake in hiking and backpacking. This influx underscores the importance of providing clear information regarding trail difficulties to enhance visitor safety and enjoyment.
To navigate the challenges of backpacking loops effectively, it is recommended that hikers prepare by researching trail conditions, utilizing resources such as the National Park Service website or local ranger stations, and equipping themselves with necessary gear, including adequate food, water, and navigation tools. Additionally, considering guided tours or joining experienced hiking groups can further mitigate risks associated with difficult loops.
How Can You Prepare for Backpacking Loops in Yosemite?
Preparing for backpacking loops in Yosemite requires thorough planning and attention to various factors to ensure a safe and enjoyable experience. Here are key steps to consider:
-
Research Trails: Identify specific loops like the Clouds Rest Loop or the Mono Meadow to Glacier Point Loop. Review trail conditions, distances, difficulty levels, and highlights to match your skillset and interests.
-
Permits: Obtain necessary wilderness permits. Yosemite National Park has specific regulations regarding backcountry camping, and many trails require permits, especially during peak season.
-
Gear Selection: Invest in quality gear suited for hiking and camping. Essential items include:
- Backpack: Lightweight with adequate capacity.
- Tent: Compact and weather-resistant.
- Sleeping Bag: Rated for the expected temperatures.
-
Cooking Equipment: Portable stove and lightweight cookware.
-
Food and Water: Plan meals with lightweight, high-energy foods. Invest in a reliable water filtration system or purification tablets for safe drinking water from natural sources.
-
Physical Preparedness: Train your body with hikes of increasing difficulty. Focus on endurance and strength to navigate various terrains effectively.
-
Safety Measures: Familiarize yourself with basic first aid, navigation skills, and bear safety practices to mitigate risks during your trek.
-
Weather Awareness: Monitor forecasts leading up to your trip to pack appropriate clothing and gear for varying conditions.
By approaching your backpacking trip with these preparations, you can navigate Yosemite’s breathtaking landscapes confidently.
What Kind of Permits Do You Need to Hike in Yosemite?
To hike in Yosemite, you may need specific permits depending on the type of hike you choose to undertake.
- Day Use Permit: Required for day hikes in certain areas of the park, especially during peak season.
- Wilderness Permit: Necessary for overnight backpacking trips in the backcountry of Yosemite.
- Group Camp Permit: Required for groups planning to camp in designated group campsites.
- Special Use Permit: Needed for organized events or commercial activities within the park.
Day Use Permit: This permit is essential for accessing popular areas such as Half Dome and other high-traffic trails, particularly during the summer months. It helps manage visitor flow and preserve the park’s natural resources.
Wilderness Permit: If you are planning to spend the night in the backcountry, a wilderness permit is mandatory. These permits help regulate the number of backpackers in the wilderness area to minimize environmental impact and ensure visitor safety, and they can be obtained through the park’s website or visitor centers.
Group Camp Permit: For larger groups wishing to camp together, this permit is required to secure a designated group campsite. It ensures that the park can accommodate various groups while maintaining the quality of the camping experience.
Special Use Permit: If you are organizing a commercial endeavor, event, or any activity that deviates from standard recreational use, a special use permit is necessary. This permit allows the park to manage and monitor activities that may have a significant impact on the park’s resources and visitor experiences.
What Essential Gear Should You Bring for these Loops?
When preparing for backpacking loops in Yosemite, it’s crucial to pack the right gear for safety, comfort, and enjoyment.
- Backpack: A durable and comfortable backpack is essential for carrying your gear. Look for one with a capacity of 50-70 liters, as it should have padded shoulder straps, a hip belt for weight distribution, and compartments to keep your items organized.
- Sleeping Bag: A high-quality sleeping bag suited for the season is vital for a good night’s sleep. Choose a bag with a temperature rating appropriate for the conditions you’ll encounter, and consider the weight and packability if you’re covering long distances.
- Sleeping Pad: A sleeping pad adds comfort and insulation from the ground. Options include inflatable pads for lightweight packing or foam pads for durability, both of which help ensure restful sleep after a long day of hiking.
- Cooking System: A compact stove and cooking system are necessary for preparing meals on the trail. Lightweight options like canister stoves or alcohol stoves are efficient, and don’t forget to pack a pot, utensils, and a way to clean your cooking gear.
- Water Filtration System: Access to clean drinking water is crucial during your hike. A portable water filter or purification tablets will allow you to safely drink from natural water sources without the risk of contamination.
- Clothing Layers: The weather in Yosemite can change rapidly, so bring moisture-wicking base layers, insulating mid-layers, and a waterproof outer layer. Packing extra socks and a hat can also help manage temperature fluctuations throughout the day.
- Navigation Tools: A map and compass or a GPS device are indispensable for navigating the trails. Familiarize yourself with the routes beforehand and ensure your devices are charged and functional for the duration of your hike.
- First Aid Kit: A well-stocked first aid kit is important for handling minor injuries or ailments. Include essentials like bandages, antiseptic wipes, pain relievers, and any personal medications you may need during your trip.
- Headlamp or Flashlight: Having a reliable light source is important for navigating in low-light conditions or setting up camp after dark. A headlamp is especially useful as it frees up your hands for tasks like cooking or setting up a tent.
- Emergency Gear: Include items such as a whistle, multi-tool, and fire-starting supplies in case of emergencies. These tools can help you signal for help or manage unexpected situations while on the trail.
What Safety Precautions Should You Take While Backpacking in Yosemite?
When backpacking in Yosemite, it’s essential to take specific safety precautions to ensure a safe and enjoyable experience.
- Stay on Designated Trails: Staying on marked paths helps preserve the natural environment and reduces the risk of getting lost. It also minimizes your chances of encountering wildlife unexpectedly.
- Bear Safety: Yosemite is home to black bears, so proper food storage is crucial. Use bear canisters or designated bear lockers and maintain a safe distance if you encounter a bear to avoid attracting them.
- Hydration and Water Safety: Always carry enough water and know how to purify natural water sources. It’s important to stay hydrated, especially at higher elevations, where dehydration can occur more quickly.
- Weather Preparedness: Yosemite’s weather can change rapidly, so check forecasts and pack accordingly. Bring layers and rain gear to protect yourself from unexpected rain or temperature drops.
- Wildlife Awareness: Be aware of your surroundings and know the types of wildlife in the area. Avoid feeding animals and know how to react if you encounter larger animals like moose or mountain lions.
- First Aid Kit: Carry a basic first aid kit to address minor injuries or illnesses. Knowing how to use the items in your kit can be invaluable in remote areas where medical help is far away.
- Navigation Tools: Always have a map and compass or GPS device, and know how to use them. Even if you’re familiar with the area, it’s easy to lose your way in dense forests or during foggy conditions.
- Leave No Trace Principles: Follow Leave No Trace principles by packing out all waste, minimizing campfire impact, and respecting wildlife and other hikers. This ensures that the natural beauty of Yosemite is preserved for future visitors.
How Can You Stay Safe from Wildlife Encounters?
To stay safe from wildlife encounters while enjoying the best backpacking loops in Yosemite, consider the following precautions:
- Keep a Safe Distance: Always observe wildlife from a safe distance, typically at least 100 yards for large animals like bears and 25 yards for smaller creatures. Getting too close can provoke defensive behavior and increase the risk of an encounter.
- Store Food Properly: Use bear-proof containers or hang food in a bear bag at least 10 feet off the ground and 4 feet away from tree trunks. Proper food storage not only keeps you safe but also prevents wildlife from becoming habituated to human food.
- Make Noise: While hiking, make noise by talking, clapping, or using bear bells, especially in dense forests or near running water. This alerts wildlife to your presence, reducing the chance of surprising an animal unexpectedly.
- Travel in Groups: Hiking in groups can deter wildlife encounters, as larger groups tend to be noisier and more intimidating to animals. Additionally, there’s safety in numbers should an encounter occur.
- Know Animal Behavior: Educate yourself about the local wildlife and their behaviors, such as how bears react when approached or what to do if you encounter a snake. Understanding their habits can help you avoid conflicts and respond appropriately if you do encounter wildlife.
- Carry Bear Spray: Having bear spray accessible can be a critical safety measure when hiking in areas known for bears. It is an effective deterrent and should be used as a last resort if a bear approaches too closely.
What Are the Emergency Procedures in Yosemite?
The emergency procedures in Yosemite are essential for ensuring safety during outdoor activities.
- Stay Calm: In any emergency situation, remaining calm is crucial as it helps you think clearly and make informed decisions.
- Assess the Situation: Evaluate the nature of the emergency, whether it’s a medical issue, lost person, or environmental hazard, to determine the appropriate response.
- Contact Emergency Services: Use a cell phone or emergency radios to contact park rangers or call 911 for immediate assistance, providing them with your location and the nature of the emergency.
- First Aid: Administer basic first aid if you’re trained and it’s safe to do so, including CPR, controlling bleeding, or treating shock while waiting for professional help.
- Follow Evacuation Routes: Familiarize yourself with evacuation routes and procedures in advance, and follow them if evacuation is necessary due to natural disasters or other threats.
- Use Signaling Methods: If you’re lost or in distress, use signaling methods like whistles, mirrors, or bright clothing to attract attention from rescuers.
- Stay Put: If you’re lost, it’s often best to stay in one place to avoid further disorientation, making it easier for rescuers to locate you.
- Report Incidents: After an emergency, report the incident to park authorities to help improve safety measures and assist in future emergency response planning.