Before testing this gear, I didn’t realize how much a reliable sleeping bag and compact cookware can make or break a cold Washington winter trip. I spent nights tossing in a flimsy sleeping bag, and let me tell you, warmth makes all the difference. The CANWAY Flannel Sleeping Bag, for example, impressed me with its ability to keep me cozy at 55°F thanks to the hollow cotton filling and soft, waterproof exterior. It’s roomy, light, and packs down small, perfect for winter backpacking. As for cooking, I tested various sets and found that the Widesea Camping Cookware Set offers a heat exchanger design that boosts efficiency over 30%, saving fuel and time, especially in cold conditions. It’s durable, lightweight, and packs conveniently in a mesh bag—ideal for rough terrain. After comparing, the sleeping bag’s combination of warmth, comfort, and smart storage makes it stand out. Together, these products truly solve the biggest winter backpacking pains—keeping warm and cooking easily in remote wilderness. Trust me, these are game-changers for a memorable Washington winter adventure.
Top Recommendation: CANWAY Flannel Sleeping Bag for Adults, Kids, and All Ages
Why We Recommend It: This sleeping bag offers an excellent balance of warmth (55°F comfort range), softness from the plush flannel lining, and water resistance. Its XL size up to 6 feet tall, along with a bottom zipper for airflow, truly boosts sleeping comfort outdoors. The waterproof, sleek storage bag with buckles makes it easy to pack and carry, perfect for winter trips. Compared to the other options, it’s notably more spacious, warmer, and designed for colder temperatures, making it the best choice for Washington’s winter conditions.
Best winter backpacking washington: Our Top 3 Picks
- Widesea Camping Cookware Set for Hiking and Backpacking – Best for Winter Camping Washington
- CANWAY Flannel Sleeping Bag Mens Kids Sleeping Bag for – Best for Winter Sleeping Comfort in Washington
- CANWAY Flannel Sleeping Bag Kids Girls Boys Camping – Best for Family Winter Camping in Washington
Widesea Camping Cookware Set for Hiking and Backpacking
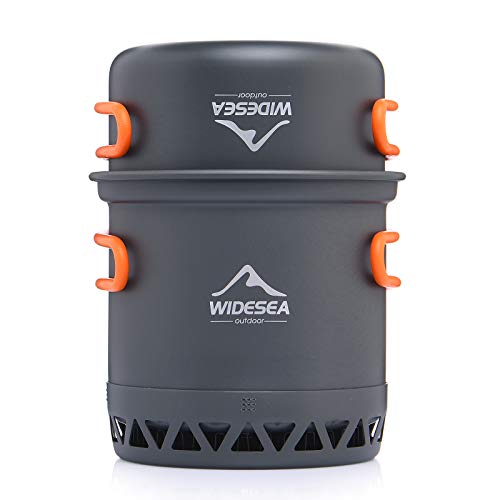
- ✓ High heat efficiency
- ✓ Lightweight and compact
- ✓ Easy to clean
- ✕ Limited capacity for groups
- ✕ No lid handle lock
| Capacity | 0.8 L pot and 0.5 L lid |
| Weight | 290 grams |
| Material | Durable, lightweight metal (implied stainless steel or aluminum) |
| Heat Efficiency | Over 30% increase with heat exchanger design |
| Handle | Anti-scalding silicone-coated foldable handle |
| Included Accessories | Mesh storage bag, gas tank, and gas burner compartment |
Imagine you’re on a chilly winter backpacking trip in Washington, the wind biting at your cheeks as you settle into your tent after a day of hiking. You pull out the Widesea Camping Cookware Set from your pack, its compact form fitting easily into your hand.
The lightweight design surprises you—just 290 grams but packed with a high-capacity pot and lid.
The heat exchanger design catches your eye immediately. As you start boiling water, you notice it heats up faster than your old set—more than 30% efficiency boost, they say.
That means less fuel used, which is a lifesaver when you’re trying to conserve weight and resources.
Handling the set is a breeze thanks to the anti-scald silicone-coated handle. It folds neatly, making storage straightforward.
You pack in your gas tank and burner into the 0.8L pot, all snug inside your hiking bag’s mesh compartment. Perfect for quick meals or hot drinks after a long day outdoors.
Cleaning is simple, thanks to the smooth surface. Even after a greasy breakfast, a quick rinse and wipe are enough.
The set’s durability feels solid, ready to withstand the rigors of more adventures. Plus, the compact size means it doesn’t take up much space in your backpack, which you appreciate on those tight, winter trails.
Overall, this cookware set feels like a smart companion for winter camping—efficient, lightweight, and practical. It makes outdoor cooking less of a chore and more of a pleasure, even in tough conditions.
CANWAY Flannel Sleeping Bag Mens Kids Sleeping Bag for

- ✓ Super soft flannel lining
- ✓ Spacious for tall users
- ✓ Waterproof, compact storage
- ✕ Not suitable below 55°F
- ✕ Might feel warm in summer
| Temperature Rating | Comfortable down to 55°F (13°C) |
| Outer Material | 230T polyester |
| Filling Material | Hollow cotton with plush flannel lining |
| Dimensions | 82.7 inches x 31.5 inches (210 cm x 80 cm), suitable for individuals up to 6 feet tall |
| Storage Size | 14.5 inches x 9.4 inches (37 cm x 24 cm) with waterproof cover and secure buckles |
| Weight | Estimated around 3-4 kg (6.6-8.8 lbs) based on materials and size |
Imagine pulling out a sleeping bag and immediately noticing how plush and inviting the flannel lining feels—like wrapping yourself in a cozy blanket. I was surprised how much warmth this Canway bag provides, even as the temperature dips to around 55°F, which I thought might be borderline chilly.
The outer material, made from durable 230T polyester, feels sturdy yet soft, and I appreciated its waterproof quality—no worries about unexpected dew or light rain. The hollow cotton filling strikes a perfect balance; it’s warm without feeling bulky, and it breathes well enough to prevent overheating.
What really caught my attention was the size. Standing about 6 feet tall, I found the XL design incredibly roomy.
The zipper at the bottom is a game-changer—allowing me to stretch out or improve airflow as needed. It’s clear this bag is designed for taller folks who want to sleep comfortably without feeling cramped.
Portability is often a concern, but the storage bag upgrades are impressive. The waterproof cover and secure buckles mean I can toss it into my backpack without worry.
When packed, it shrinks down to a manageable size, perfect for backpacking trips or spontaneous camping adventures.
Overall, this sleeping bag blends comfort, durability, and practicality. It’s an excellent choice for outdoor lovers who demand quality, warmth, and a bit of extra room to stretch out.
CANWAY Flannel Sleeping Bag Kids Girls Boys Camping

- ✓ Soft and skin-friendly
- ✓ Spacious and movable
- ✓ Easy to zip and unzip
- ✕ Limited temperature range
- ✕ Not suitable below 55°F
| Material | 230T polyester outer shell with hollow cotton filling |
| Dimensions | 82.7 inches (length) x 31.5 inches (width) |
| Storage Size | 14.5 inches x 9.4 inches |
| Temperature Rating | Comfortable at 55°F (13°C) |
| Zipper System | Two-way zipper with zipper guard |
| Weight | Lightweight (exact weight not specified) |
The first time I slipped into the CANWAY Flannel Sleeping Bag for kids, I immediately noticed how soft and cozy it felt against my skin. The 230T polyester surface is smooth and gentle, making it perfect for sensitive skin, especially after a long day of outdoor adventures.
Unzipping it, I appreciated the roomy 82.7″ length and 31.5″ width—there’s plenty of space for movement. The foot vent with the separated zipper is a game-changer; I could stick my feet out without exposing myself to the cold, which made a huge difference on chilly nights.
It’s surprisingly lightweight, so carrying it around was no hassle. When I crawled inside, I felt instantly warm, even at around 55°F.
The hollow cotton filling really insulates well, keeping me cozy without overheating.
The zipper system is smooth and secure, thanks to the two-way zipper and zipper guard. I didn’t get stuck once, and it was easy to zip myself up or open from inside.
The design really considers comfort at every step.
Overall, this sleeping bag offers a good balance of warmth, freedom of movement, and comfort. It’s perfect for kids or anyone looking for a reliable winter camping option that’s easy to pack and carry.
It’s simple but effective, making outdoor nights more enjoyable and less stressful.
What Are the Best Locations for Winter Backpacking in Washington?
The best locations for winter backpacking in Washington offer stunning scenery and diverse trails suitable for various skill levels.
- Mount Rainier National Park: Known for its breathtaking views, Mount Rainier provides a variety of trails that are open for winter backpacking. The park’s diverse ecosystems and snow-covered landscapes create a magical atmosphere, while the trails range from easy to challenging, allowing backpackers to choose according to their experience.
- Olympic National Park: Olympic National Park features rugged coastlines, towering mountains, and lush rainforests, making it a unique winter backpacking destination. The park’s diverse climate allows for various winter experiences, from snowy mountain trails to milder coastal hikes, catering to different preferences and skill levels.
- North Cascades National Park: The North Cascades are renowned for their dramatic peaks and deep valleys, offering stunning vistas and a sense of solitude. The winter months transform the landscape into a winter wonderland, with opportunities for snowshoeing and winter camping along the myriad of trails that traverse the park.
- Snoqualmie Pass: Snoqualmie Pass is a popular location for winter recreation, with numerous trails easily accessible from the road. The area is ideal for both novice and experienced backpackers, featuring well-maintained paths and a vibrant winter sports community, making it a lively destination during the snowy months.
- Mount Baker-Snoqualmie National Forest: This forest offers a plethora of trails suitable for winter backpacking, surrounded by pristine wilderness and stunning alpine scenery. The area is known for its heavy snowfall, making it perfect for those who enjoy deep snow experiences and the challenge of winter hiking.
Which Trails Are Ideal for Scenic Winter Views?
The best winter backpacking trails in Washington offer stunning scenic views and unique winter landscapes.
- Mount Rainier National Park: This iconic park provides breathtaking views of snow-capped peaks and frozen waterfalls.
- Olympic National Park: With its diverse ecosystems, this park features coastal views, snow-covered mountains, and ancient forests.
- North Cascades National Park: Known for its rugged terrain, this park offers dramatic mountain scenery and serene snow-laden forests.
- Snoqualmie Pass: A popular destination for winter sports, it also features beautiful trails with views of the surrounding peaks.
- Mount St. Helens: This area provides a unique perspective on a volcanic landscape, with views of the crater and surrounding snowy hills.
Mount Rainier National Park offers some of the most stunning backdrops, particularly when the snow blankets the landscape, creating a serene atmosphere. Trails like the Skyline Trail offer access to views of the majestic Mount Rainier and surrounding valleys.
Olympic National Park is renowned for its varied terrain, which includes rugged coastlines and snow-covered mountains. The Enchanted Valley trail, for instance, showcases stunning winter vistas of the river valley framed by snow-capped peaks.
North Cascades National Park is less traveled in winter, making its pristine snowy landscapes even more captivating. The Cascade Pass trail provides spectacular views of the rugged peaks and serene winter wonderland, ideal for adventurous backpackers.
Snoqualmie Pass is a favorite among winter enthusiasts, featuring trails that offer easy access to breathtaking views of the surrounding mountains, including the popular Rattlesnake Ledge Trail, which presents a rewarding vista at its summit.
Mount St. Helens offers a unique winter experience, with trails that lead to viewpoints overlooking the crater. The cold winter air enhances the stark beauty of the landscape, making it a visually striking location for those looking to explore the effects of the volcanic eruption amidst a winter setting.
What Trails Are Recommended for Beginner Winter Backpackers?
For beginner winter backpackers in Washington, several trails offer manageable distances and stunning scenery.
- Rattlesnake Ledge: This popular trail near North Bend provides a moderate climb with a well-maintained path, making it ideal for beginners. The trail is approximately 4 miles round trip and offers breathtaking views of Rattlesnake Lake and the surrounding mountains.
- Mount Rainier National Park – Paradise Area: The trails around Paradise are often accessible during winter, featuring gentle slopes and stunning views of Mount Rainier. Beginners can enjoy paths like the Skyline Trail, which offers a variety of distances and can be tailored to skill levels, with opportunities for snowshoeing and winter photography.
- Leavenworth – Icicle Gorge Trail: This 4-mile loop is perfect for those looking for a scenic winter hike without the extreme elevation gain. The trail meanders through a beautiful forested area along the Icicle River, providing a peaceful atmosphere and the chance to see winter wildlife.
- Snoqualmie Pass – Gold Creek Pond: A short and easy 1.5-mile loop, this trail is perfect for beginners and families. The frozen pond and surrounding snow-covered landscape create a picturesque winter wonderland, with ample opportunities for snowshoeing and enjoying a winter picnic.
- Mount Si Trail: While it is a more challenging option, the lower portion of this popular trail can be attempted by beginners looking for a bit more adventure. The first 2 miles are well-trodden and can be a great introduction to winter hiking, offering views of the Snoqualmie Valley.
What Essential Gear Do You Need for Winter Backpacking in Washington?
For winter backpacking in Washington, having the right gear is crucial for safety and comfort.
- Four-season tent: A four-season tent is designed to withstand harsh winter conditions, including heavy snow and strong winds. It typically has a lower profile and stronger poles compared to three-season tents, ensuring stability and insulation in cold environments.
- Sleeping bag rated for low temperatures: A sleeping bag with a temperature rating suitable for winter is essential to keep you warm during cold nights. Look for bags with down insulation or high-quality synthetic materials that provide excellent warmth-to-weight ratios and retain heat effectively.
- Insulated sleeping pad: An insulated sleeping pad adds an extra layer of warmth and comfort between you and the cold ground. It helps prevent heat loss through conduction and provides cushioning for a better night’s sleep.
- Layered clothing system: A layered clothing system allows you to adjust your insulation and moisture management based on activity levels and changing weather conditions. Start with moisture-wicking base layers, add insulating mid-layers, and finish with a waterproof and breathable outer layer to protect against the elements.
- Winter-specific backpack: A backpack designed for winter conditions often includes features like an adjustable harness, reinforced areas for carrying gear like snowshoes or skis, and a waterproof exterior. Ensure it has enough capacity to carry your winter gear while remaining comfortable during hikes.
- Snowshoes or crampons: Depending on the terrain, snowshoes will help you navigate deep snow, while crampons provide traction on icy surfaces. Both devices enhance stability and safety, allowing you to traverse winter landscapes more effectively.
- Quality trekking poles: Trekking poles can provide extra stability and support on uneven or slippery terrain during winter hikes. Look for poles with adjustable lengths and snow baskets to prevent sinking into the snow.
- Navigation tools: Reliable navigation tools, such as a map, compass, and GPS device, are essential for winter backpacking. Snow can obscure trails, so having the ability to navigate accurately is crucial to avoid getting lost in unfamiliar areas.
- First aid kit: A comprehensive first aid kit tailored for winter conditions should include items for treating frostbite and hypothermia, as well as basic first aid supplies. Being prepared for injuries or emergencies can be life-saving in remote winter environments.
- Portable stove and fuel: A portable stove allows for cooking warm meals and melting snow for drinking water, which is vital in winter when traditional water sources may be frozen. Ensure you use fuel compatible with cold temperatures for optimal performance.
What Clothing and Equipment Are Crucial for Staying Warm?
To stay warm while winter backpacking in Washington, it’s essential to have appropriate clothing and equipment.
- Insulated Jacket: A high-quality insulated jacket, preferably down or synthetic, provides essential warmth by trapping body heat. Look for jackets with a water-resistant outer layer to protect against wet conditions typical in Washington’s winter.
- Base Layers: Moisture-wicking base layers made of merino wool or synthetic materials help regulate body temperature while keeping you dry. These layers should fit snugly to provide warmth without bulk and work effectively to wick sweat away from your skin.
- Waterproof Pants: Waterproof or water-resistant pants are crucial for staying dry during wet and snowy conditions. Look for pants with insulation for added warmth and features like adjustable cuffs and ventilation zips for comfort while hiking.
- Winter Boots: Insulated, waterproof boots with good traction are vital for navigating snowy and icy terrains. Ensure they fit well to prevent blisters, and consider using gaiters to keep snow out and provide extra insulation around your ankles.
- Warm Hat: A warm, insulated hat is essential since a significant amount of body heat can be lost through the head. Choose a hat that covers your ears and is made from materials like wool or fleece for maximum warmth.
- Gloves or Mittens: Insulated gloves or mittens are necessary to keep your hands warm and functional. Mittens generally provide more warmth than gloves because they keep fingers together, but gloves allow for better dexterity when handling gear.
- Sleeping Bag: A sleeping bag rated for winter conditions will ensure you stay warm during the night. Look for bags with down insulation or synthetic fill, which provide excellent warmth-to-weight ratios while being compressible for easy packing.
- Sleeping Pad: An insulated sleeping pad is important for providing a barrier between you and the cold ground. Choose a pad with a high R-value to ensure adequate insulation for winter camping.
- Backpack: A winter backpack should be durable and have enough capacity to hold all your gear, with features like external attachment points for carrying snowshoes or skis. Look for backpacks that are comfortable to wear with sufficient padding and ventilation for long hikes.
- Portable Stove: A lightweight, portable stove is important for melting snow and cooking hot meals to maintain energy and warmth. Opt for a stove that performs well in cold temperatures and can use fuel canisters or liquid fuels suitable for winter conditions.
Are There Any Must-Have Accessories for Cold Weather Backpacking?
When preparing for cold weather backpacking, especially in regions like Washington, certain accessories are essential for comfort and safety.
- Insulated Sleeping Pad: An insulated sleeping pad provides a barrier between you and the cold ground, retaining heat and improving your sleep quality. Look for pads with a high R-value to ensure adequate insulation against frigid temperatures.
- Winter Sleeping Bag: A good winter sleeping bag is crucial for keeping warm during cold nights. Choose a bag rated for temperatures lower than what you expect to encounter, and consider down insulation for its excellent warmth-to-weight ratio.
- Layered Clothing System: A layered clothing system, including moisture-wicking base layers, insulating mid-layers, and waterproof outer layers, allows you to adjust to varying activity levels and weather conditions. This flexibility helps regulate body temperature and keeps you dry and warm.
- Gaiters: Gaiters protect your legs from snow, mud, and debris while hiking. They provide an additional layer of insulation and keep moisture from entering your boots, which is vital for maintaining warmth and comfort during winter trekking.
- Winter Boots: Insulated and waterproof winter boots are essential for maintaining warmth and traction on snow and ice. Look for boots with good ankle support and a rugged outsole to enhance stability and grip in slippery conditions.
- Hand and Foot Warmers: Disposable or reusable hand and foot warmers can be lifesavers in extreme cold. They provide extra warmth when placed inside gloves or boots, helping to prevent frostbite and keep your extremities comfortable.
- Snowshoes or Crampons: Depending on the terrain, snowshoes can help you traverse deep snow, while crampons are necessary for icy trails. Both accessories enhance mobility and safety, allowing you to explore winter landscapes effectively.
- Headlamp with Extra Batteries: A reliable headlamp is essential for navigating in low-light conditions, especially during shorter winter days. Ensure you have extra batteries on hand, as cold weather can reduce battery life.
- Waterproof Backpack Cover: A waterproof backpack cover protects your gear from snow and rain. Keeping your backpack dry is crucial for preventing equipment damage and maintaining access to dry clothing and food.
- Emergency Bivvy or Survival Blanket: An emergency bivvy or survival blanket is a lightweight and compact safety tool for unexpected nights outdoors. It provides insulation and can help retain body heat in survival situations, making it a smart addition to your gear.
What Safety Precautions Should You Take When Winter Backpacking in Washington?
When winter backpacking in Washington, it’s crucial to take specific safety precautions to ensure a safe and enjoyable experience.
- Proper Gear: Ensure you have the right gear including waterproof boots, insulated clothing, and a four-season tent. This gear protects against cold, wet conditions and helps to maintain body heat during freezing temperatures.
- Weather Awareness: Check weather forecasts before your trip and be prepared for sudden changes. Winter storms can develop quickly in Washington’s mountainous regions, making it essential to stay informed about conditions that could impact your safety.
- Navigation Skills: Familiarize yourself with navigation tools such as maps, compasses, and GPS devices. In winter, trails can be obscured by snow, and having good navigation skills is vital for staying on course and finding your way back.
- Avalanche Safety: Be aware of avalanche risks in certain areas and carry proper equipment like avalanche beacons and shovels. Understanding avalanche terrain and conditions can help you avoid dangerous areas and increase your safety on the slopes.
- Hydration and Nutrition: Stay hydrated and well-fed, even in cold weather. The body burns more calories in the cold, and maintaining energy levels is essential for endurance and safety during winter hikes.
- Travel in Groups: Whenever possible, travel with others for safety and support. In case of an emergency, having companions can make a significant difference in handling various situations and providing assistance.
- First Aid Kit: Carry a comprehensive first aid kit and know how to use its contents. In winter conditions, injuries can be more severe due to cold exposure, so being prepared for any mishap is critical.
- Emergency Plan: Always have an emergency plan and let someone know your itinerary. This ensures that someone is aware of your location in case you encounter difficulties and need assistance.
How Can You Prepare for Changing Weather Conditions?
To prepare for changing weather conditions while winter backpacking in Washington, consider these essential items:
- Layered Clothing: Proper layering is crucial for managing body temperature and moisture. Start with a moisture-wicking base layer, add an insulating layer for warmth, and finish with a waterproof and windproof outer layer to protect against the elements.
- Weather-Resistant Backpack: A durable, weather-resistant backpack will help keep your gear dry and safe from snow and rain. Look for backpacks with water-resistant materials and sealed seams, as well as features like a rain cover for extra protection.
- Navigation Tools: In winter, visibility can be compromised, so reliable navigation tools are essential. Carry a map and compass, and consider a GPS device or a smartphone with offline maps to ensure you stay on course even in poor weather.
- Emergency Gear: Always pack emergency gear such as a first aid kit, a multi-tool, and a whistle. Additionally, include a headlamp with extra batteries and a fire-starting kit to maintain safety and visibility during unexpected weather changes.
- Insulated Sleeping System: A well-insulated sleeping bag and sleeping pad will keep you warm during frigid nights. Choose a sleeping bag rated for low temperatures and an insulated pad to provide an extra barrier against the cold ground.
- Food and Hydration Supplies: Bring high-energy, easily prepared foods that won’t freeze easily, along with a reliable method for melting snow for drinking water. Insulated water bottles can help prevent your liquids from freezing while you’re on the trail.
- Snow Safety Equipment: When backpacking in winter, it’s important to carry snow safety gear like snowshoes, crampons, or an ice axe if you plan to traverse icy terrain. These tools can greatly enhance your stability and safety in snowy conditions.
What Are the Risks of Winter Backpacking and How Can You Mitigate Them?
The risks of winter backpacking in Washington can be significant, but understanding them and implementing mitigation strategies can enhance safety and enjoyment.
- Hypothermia: This condition occurs when the body loses heat faster than it can produce it, leading to dangerously low body temperatures. To mitigate this risk, wear moisture-wicking base layers, insulated clothing, and always carry extra layers to adapt to changing weather conditions.
- Avalanche Danger: Winter backpacking often happens in areas prone to avalanches, which can be deadly if not properly assessed. To reduce this risk, educate yourself on avalanche safety, carry necessary gear like beacons and shovels, and check avalanche forecasts before heading out.
- Frostbite: Frostbite can occur on exposed skin in extremely cold temperatures, leading to permanent damage. To prevent frostbite, ensure all skin is covered, especially extremities, and regularly check for signs of frostbite while on the trail.
- Navigation Challenges: Snow-covered trails can obscure landmarks and make navigation difficult, increasing the risk of getting lost. Utilize GPS devices, carry a map and compass, and familiarize yourself with the area beforehand to ensure you can navigate effectively.
- Injury Risk: Icy and snow-covered terrain increases the likelihood of slips, trips, and falls, which can result in serious injuries. To mitigate this, wear appropriate footwear with good traction, use trekking poles for stability, and choose well-maintained trails.
- Limited Daylight: In winter, daylight hours are significantly shorter, which can lead to being caught out after dark. Plan your hikes to begin early in the day, bring extra headlamps or flashlights, and always keep an eye on your time to ensure you return before sunset.
What Tips Can Enhance Your Winter Backpacking Experience in Washington?
To enhance your winter backpacking experience in Washington, consider the following tips:
- Choose the Right Gear: Investing in high-quality gear is essential for winter backpacking. Look for items like insulated sleeping bags, waterproof tents, and layering clothing systems to keep warm and dry in the cold and wet conditions typical of Washington winters.
- Plan Your Route Wisely: Research and select trails that are suitable for winter conditions. Some trails may become inaccessible due to snow or ice, so it’s important to check current trail conditions and choose paths that are known for winter accessibility.
- Understand the Weather: Winter weather in Washington can change rapidly, and being prepared is crucial. Always check the weather forecast before your trip and be ready to adapt your plans to avoid severe conditions such as heavy snowfall or freezing temperatures.
- Practice Winter Navigation: Familiarity with navigation tools like a compass and map is vital, especially in snowy conditions where trails may be obscured. Enhance your skills in winter navigation to avoid getting lost and to find your way safely in unfamiliar terrain.
- Stay Hydrated and Fueled: Cold weather can mask your body’s need for hydration, so ensure you are drinking enough water. Additionally, pack high-energy snacks that can be consumed quickly, as maintaining energy levels is essential for keeping warm and motivated during your hike.
- Travel with a Buddy: Hiking with a partner in winter conditions increases safety and provides support in case of emergencies. A companion can help with decision-making, share the load, and provide assistance if one of you encounters any difficulties.
- Know How to Use Safety Equipment: Carrying safety equipment like avalanche gear, first aid kits, and emergency blankets is crucial. Ensure you are trained in using this equipment effectively to prepare for potential emergencies while out in the wilderness.
- Adjust Your Backpacking Pace: Winter backpacking often requires a slower pace than in warmer months due to snow and ice. Be mindful of your physical limits and make adjustments to your schedule to accommodate for increased exertion and shorter daylight hours.
How Can You Stay Energized and Warm During Your Hike?
To stay energized and warm during your winter hike in Washington, consider the following strategies:
- Layered Clothing: Wearing multiple layers helps trap heat while allowing moisture to escape. Start with a moisture-wicking base layer, add an insulating mid-layer, and finish with a waterproof and windproof outer layer to protect against the elements.
- High-Energy Snacks: Consuming high-calorie, easily digestible snacks like nuts, energy bars, and dried fruits will keep your energy levels up. These foods provide quick energy boosts and are often lightweight and easy to carry.
- Staying Hydrated: It’s essential to drink plenty of water, even in cold weather, to maintain energy and prevent fatigue. Carry insulated water bottles or hydration systems that prevent freezing, and consider warm beverages for added comfort.
- Regular Breaks: Taking short, frequent breaks can help manage your energy levels and prevent exhaustion. Use these breaks to eat, hydrate, and adjust your layers as needed to maintain warmth without overheating.
- Footwear Choices: Insulated, waterproof boots with good traction are vital for hiking in winter conditions. Proper footwear helps prevent cold feet and maintains stability on snowy or icy trails.
- Physical Conditioning: Preparing your body through regular exercise before the hike enhances endurance and stamina. Focus on cardiovascular fitness and strength training to ensure your body can handle the demands of winter hiking.
- Group Hiking: Hiking with a group can provide motivation and warmth through shared body heat. Additionally, having companions can enhance safety, allowing for shared resources and support in case of emergencies.